Showing posts with label Pinterest. Show all posts

Wednesday, July 13, 2016

Piñata AWESOMENESS

For my daughters birthday I wanted a piñata for the kids to break apart since it seems like the kind of party game that every kid is supposed to have.  I had two reservations about having a pinata though:

1)  Will it cost a lot?
2)  Is it going to take a body builder to break it open:  I've seen this happen and the dissappointment
     on those kids' faces were just... so sad.  :(

What do I do?  Look to see if I can make one, of course!

I used eHow.com for my inspiration.  eHow.com had paper mache directions that I used, but then I also added my own touch.  Here is how I did it:

Step 1: Decide what shape you want and gather your materials:
  • news paper
  • balloons
  • flour
  • sauce pot
  • salt
  • measuring cup
  • scissors
  • tape
  • paint
  • Tissue paper
  • Bowl
I wanted to make a cute bee hive since a honey bee was the theme of the party.  Seems easy enough.


Step Two:  Take some of the news paper and tear or cut them into strips.  It doesn't matter how nice they look cause by the time they dry, you cant really tell any of them apart.

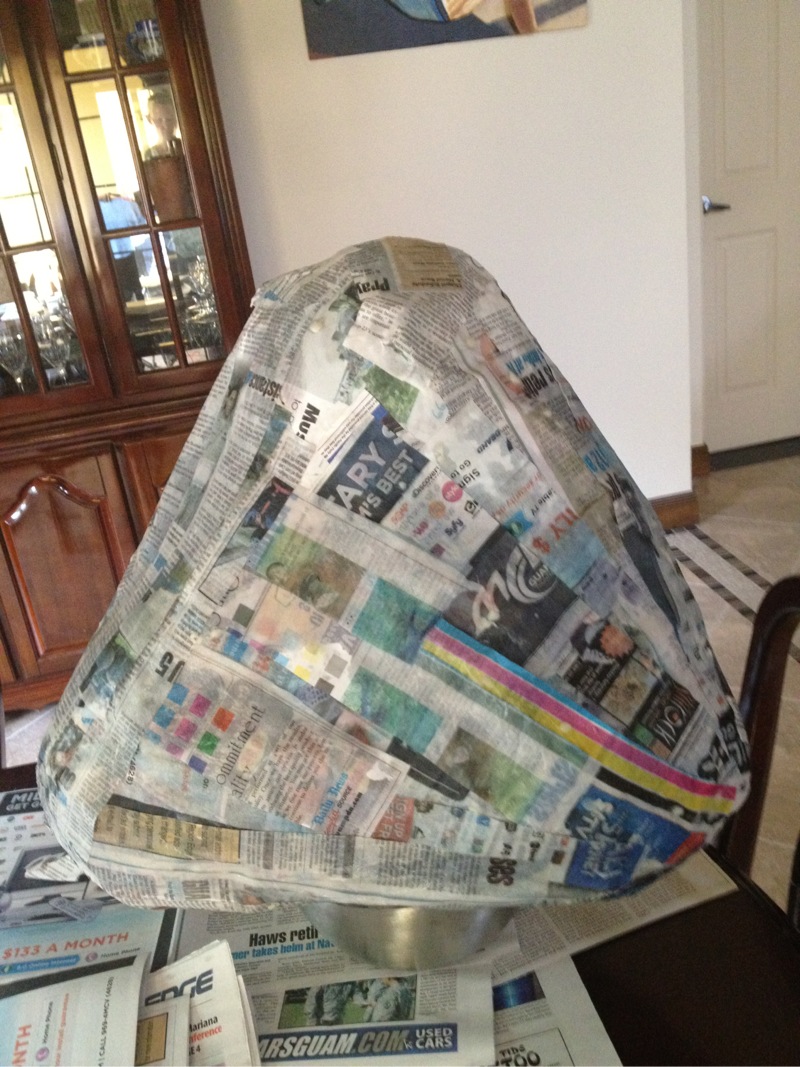
Step Three:  Make the piñata design.  eHow said to use one balloon but that was too small for me.  I wanted something large!  So I used 4 balloons.
  • I can tell you right now that this was a pretty unstable start to laying down strips of paper so I took large sheets of news paper and covered the balloons using the tape to keep the paper in place, to shape it into what I wanted it to look like.  
  • It didn't take on the perfect beehive shape, but in the end it worked out quite well.


Step Four:  Make the Paste.
  • I was not very precise with this.  I used about 2/3 cup flour
  • poured in some water (probably about a cup and a half)
  • let it boil till it was a little thick
  • threw in a pinch of salt
  • stirred it while it cooled
NOTE: Since it thickens when it cools, don't let it get too pasty when it is hot


Step Five:  Run the news paper strips through the past and put onto the piñata.  This is when you use your bowl.  to steady the piñata.
  • Make sure your paste is warm and not hot!  I burned my fingers a couple of times.  Silly me.
  • Each strip does not have to have paste globed on.  Just a nice even sheen of it.
  • I would put one end of the strip in the paste and hold it while with my other hand, put my finger over the paper to make sure that the bottom side of the strip met with the past.  Then with the hand holding onto the end of the strip that is in the paste, I lifted it up so that the whole strip would run under my finger catching past on it.  Did that make any sense at all?  I apologize if it did not.
  • After running the strip through the past, I would hold the top with one hand and run my thumb and index finger down the strip to remove any extra paste
  • Repeat for the other side to get all pasty
  • Apply to the piñata.
  • NOTE:  I put on 3 layers of large pieces of news paper and 3 layers of the pasted strips.  The weight of the newspaper kind of made it sag down so I didn't do more than that.


Step Six:  Wait for piñata to dry.  This may take a while depending on how many layers and how much paste you used.  Mine took about 2 days but it was also under an AC unit.

Step Seven:  Paint the piñata.
  • It would be best if you got a primer but I didn't have any and thought that 2 coats would be enough.  Wrong!  You can see in the picture that even with two coats, you could still see the newspaper. Super Lame!  I'm not spending any more money on this thing so I've decided to cover it with tissue paper.


Step Eight:  Cut hole at top.  I did mine just big enough to put in toys candy and a child's hanger.

Now... if you did it right... you don't have to use tissue and could just paint it so step nine is not required!

Step Nine:  Put tissue paper on it.
  • If I had put primer on it then I wouldn't have had to spend so much time with the tissue.  I could have just cut out squares and pasted them on but because you could see all the news paper, I had to add an enormous amount of tissue paper!  I do believe that it worked out to my favor though.
    • Cut out two by two inch squares of tissue
    • take one square and wrap it around your finger (put index finger in middle of square and squish the rest of the tissue upwards around it).
    • dot your finger (with the tissue still on it) into the paste and place it on the piñata however you want.


This took some time but I enjoyed it.

Every party item I bought was yellow black and white polka dotted

By this point I was about to pull out my hair and you can see the white hadn't been added yet.

Step Ten:  Put in candy, toys and child's hanger.
  • I did not fasten the child's hanger to it
I was so nervous to have the kids play with it.  Would it break too easily?  Would it take a muscle man to break it?  Will the hanger break off before the kids can break it?  ect ect ect...

It was perfect.  All the kids got a chance to hit it.  It didn't take an adult to break it open.  The hanger did not break and was perfect for hanging on a pole since I did not have a tree.

I got a lot of compliments (even though I felt it was kind of a fail), and to say that I made it, felt pretty good too.

Yeah, I am kind of a dumb dumb because I never took a picture of it before it got killed by the kiddos.

As for the cost:

News paper - free
Flour - $1.50
Salt $1
Tissue paper $2 (bought it at a store where a bunch of it was only a dollar!  Good Deal)
Paint $2.50 (Home Depot sample size and technically it was left over from when I painted something else)
This does not include the stuff I put in it

Total:  $7
Time it took to make it?  A LOT

Was it a nail or a fail?  
NAIL and FAIL
I would say NAIL because it was only $7 to make but a FAIL when it came to how much time it took.   So if you like to be crafty then I totally recommend it.  If you need something quick and just don't have the time, then buy one cause you can get them as cheap as $15  GOOD LUCK!!

Tuesday, August 21, 2012

Butt Wipes

My daughter is not one yet so I have been trying to save money on all sorts of things that she requires.  I want to focus on one item that I see quite frequently on Pinterest.  Homemade Baby Wipes.  

I found the pin on Pinterest back in March and have been working on perfecting this particular baby wipe.  It is from Homemade Mamas.  You should check out their site.  It is full of awesome ideas.

So, according to Homemade Mamas all you need is:

  1. A round plastic container with tight-fitting lid
  2. Thick strong roll of paper towels (Viva is the best)
  3. Sharp, Serrated knife to cut paper towel roll in half
  4. 2 cups water, boiled and cooled to room temp
  5. 2 Tbs. baby shampoo or wash
  6. 1 Tbs. baby oil
Well that sounds easy enough.  So I tried it.

I did not know that I was going to be doing this blog so I didn't take pictures when I made them for the first time.  I just made mental notes of what I liked and didn't like.

Things I liked:
  • Paper towel rolls have lots of squares.  That times 2?  Awesome!
  • Baby wash or shampoo sounds good to me since you have to put it on your baby anyway.
  • My friend Lisa and Christie gave me a bottle of Burt's Bees honey baby oil for my shower so my babies bum smelled so sweet after using my homemade wipes.
Things I had to change:
  • The paper towel roll!  When you cut it, it makes a huge mess.  Also, all the towels are connected so it can be a huge pain to get them to come apart but you will find this for ALL baby wipes.  I mean all of them (I have found anyway).
  • Less water cause when the towels sit in the water for too long they disintegrate and then you have a mess and it gets pretty gross.
  • Again the paper towel role.  It was not easy to just pull out a piece.  They started ripping constantly when they sat in too much water and the roll started sagging.
After several sessions tinkering with my baby wipes, I feel that I have finally come up with something that is still not perfect but better.  I will always keep trying to make them inexpensive and easy to use.


Here is a list of items that I use:
  • Baby shampoo ($2)
  • Baby oil (regular baby oil is about 70 cents for a bottle about the same size as shown)
  • Kleenex 2 ply dinner napkins ($1 for one package of 50)
  • Scissors 
  • 1 Tbs and 1/2 Tbs
  • Container (shown is Ziplock)
  • Baby wipe container (not needed but not bad to have)
  • 1 and 1/3 cup water boiled and cooled (I don't know why but I think it has something to do with purifying)
This is what I do:

  1. 1 Tbs of baby wash and 1/2 Tbs of baby oil into container with 1 and 1/3 cup water- MIX
  2. take about half the package of Kleenex table napkins and cut in half
  3. fold napkins into each other (pictures below)
  4. lightly dunk each side into mixture.  There should be JUST enough mix to get everything wet enough to use but no extra water for it to sit in
  5. Put into container


$3.70 for 50 wipes does not sound very good BUT you have enough baby wash and baby oil to get you through at least another 5 rounds.  So let me break it down mathematically:

  • $1 per Kleenex.  That means you need to buy 3 packages for 6 rounds = $3
  • .70 cents for small baby oil = .70 cents
  • $2 bottle of baby wash = $2
  • hopefully you already have a container

Total is $5.70 for 300 wipes AND you still have enough baby wash/shampoo to get you through even more wipes without having to buy a new bottle.

THINGS I WANT TO POINT OUT:
  • if you are a military ID card holder with privileges to the BX, NEX and so on... then you can go to the Navy Exchange website and get a box of 432 wipes for $4.50.  
  • If you do NOT hold a military ID card and have to buy at the store then a store brand may be just as inexpensive.
  • I have had no problems with diaper rash since using these homemade wipes.
  • Having the baby wipe container helps pull the pieces apart better than the ziplock container.
  • Add a little food coloring to the mix and you can have your wipes match the room!
After several tries I feel that I have NAILED it!


Friday, August 10, 2012

Nifty Nails

I was looking at my nails last week and thought to myself 'It's time you fix these, Bri'.  I always see those awesome nail pictures that are on Pinterest where they are holding a little jar of finger nail polish or something to show off their super pretty nails.  Nails that you don't think that you could ever possibly have BUT you CAN!

Check it out:


Now it's not as beautiful as the pics that you will see on Pinterest but gosh darn it, it's pretty darn close and the best part of it is that I only paid $4.50 for this and people thought that it was professional!

Usually I am not a fake nail kind of girl nor do I ever mess with the press on nails because they obviously look retarded BUT I was going through my BX (Base Exchange.  My hubbs is in the military) and found these Sally Hansen Salon Effects Real Nail Polish Strips.  Basically it's like a sticker but it's a nail polish sticker.

I have a basket full of different colored nail polishes and I'm sure that you probably have one too since that stuff kind of accumulates over time.  I just happen to also have a white and black bottle of polish which is awesome cause they will go with pretty much ANY of the designs that the Salon Effects offers.


This is what is inside of the small box for $8.95:

You can see that there are two containers with nail strips.  Once you open the container, you have to use them!

This is how I only paid $4.50:

  1. Open only one container
  2. There are 8 strips inside.  Pick one strip that will fit over the nail of your choice on your hand.  That one will hopefully work for the finger of your choice on both hands.  If not then that is fine, just use another strip.
  3. Place the strip on your nail so that any extra you don't need is sticking up from the top.
  4. With pressure on the strip over the nail, pull the extra down and off so that you have another piece to use on another nail.
  5. By doing this I was able to do my toes too:

When I took the picture, the pinkie toes were drying from a first coat of polish.  They were just as white when I finished as all the other white nails.
     6.  Then save the other half the package for another time!

Other things to consider:

  • The strips last longer than the nail polish
  • The strips are super hard to get off.  It took a while to wipe them off with nail polish remover.
  • If you do not use the strip, it will dry out!  I waisted half a package not realizing that.  Duh, right?


Tuesday, July 31, 2012

Vinegar Craziness

I felt a little guilty that my master bathroom had gotten soooo gross that I finally decided to try and clean it yesterday.  I got out my normal Windex, paper towels and a can of scrubbing bubbles.  After spraying down the shower with scrubbing bubbles, I let it sit and tried to clean my glass shower door.

Even after two sprays and rub downs, my glass door still looked like this:


I guess it's because of the flash but the soap scum goes all the way down to the bottom.  I would also like to point out that we DO have a water softener and I have come to learn that whether you have hard or soft water, you are always going to have issues.

ALSO, please notice the black line on the left side of the picture.  It is forming in the corner of the wall and floor.  I never thought to take a pic of it but was glad to find that you can see it even through the soap scum.

I gave up cleaning the door and went straight to the shower.  That will at least be clean cause, HEY!  The bubbles scrub it for you, Right? 

WRONG!

THEY DID NOT.

Here are some more pics (please note the pics were taken after the scrubbing bubbles were washed off and became dry):


The first picture is of the shower behind the glass door and then the second picture is the knobs for the shower that is right next to it.  Why we have two showers in one stall.  Doesn't make sense buuuut that is how it is.

Okay.  Okay.  You may be thinking 'well, if you would just clean it at least once a week, you wouldn't be having this problem now would you?'  and you are right.  I am making a face at you though.  I should be cleaning it at least once a week but I really want to do OTHER things in my life.  Like...  ANYTHING!  I hate cleaning. 

Anyway, I remembered seeing some vinegar thingy on Pinterest and looked it up.  You can find the website HERE where they tell you to:

  1. Microwave 4 oz of vinegar till it's warm 

  2. Pour into spray bottle with 4 oz of blue Dawn dish soap

  3. Spray onto soap scum, wherever it may be

  4. The thicker the soap scum the longer you should let it sit.  Even all night works.
Luckily, I do have both vinegar AND Dawn dish soap, which is really weird because I usually have Palmolive.  Palmolive is cheaper than Dawn, has a nice orange citrusy smell and (IMHO) works just as well BUT I bought the Dawn Pure Essentials because it is hypoallergenic AND has been made with 25% post consumer recycled material (Please click HERE to find out more about why that makes me happy to spend more money).  It isn't that much more money though.  The Dawn PE was $2.18 and the Palmolive is $1.69 (neither one on sale).  I am switching to Dawn.

My first thought was that I was going to fail this because they were pretty specific that I use the BLUE Dawn detergent and the Dawn PE is NOT blue.  It's clear. I figured I would try it anyway because then we would know FOR SURE that you do, in-fact, have to have the blue dawn.

This is how my shower turned out:


I sprayed it on, waited 20 min and used the yellow part of the sponge to wipe everything while using the shower head to spray everything down and drain.  You can see in the second to last pic that there was a spot of soap scum on the end of the knob but honestly that too came right off... I didn't even see it till I took the pic and then forgot to take another one.  *sigh*

Remember that black line from the very first picture?  It use to be in the crack of the last picture.  I wish I had taken more pictures but like I said, I thought I was going to fail this assignment.

OH, BTW...  one cup vinegar (heat up for 1 min) and one cup Dawn mixed was perfect for the size to spray all of my shower.  Even with the fan on, I had a hard time with the smell of it.  Once I washed it all off it took about an hour for the smell to be gone.  Dawn is 24 oz big divide by 4 oz gives you 6 cleanings which for me is a years worth of cleaning.  Gross, I know but hey!  *shrug*

NAILED IT!!   Thank you Bobbin from Food.com!!

Next time I will try it with Palmolive and see if that works just as well (I have a feeling its all about the vinegar)


Saturday, July 28, 2012

Glass Brownies


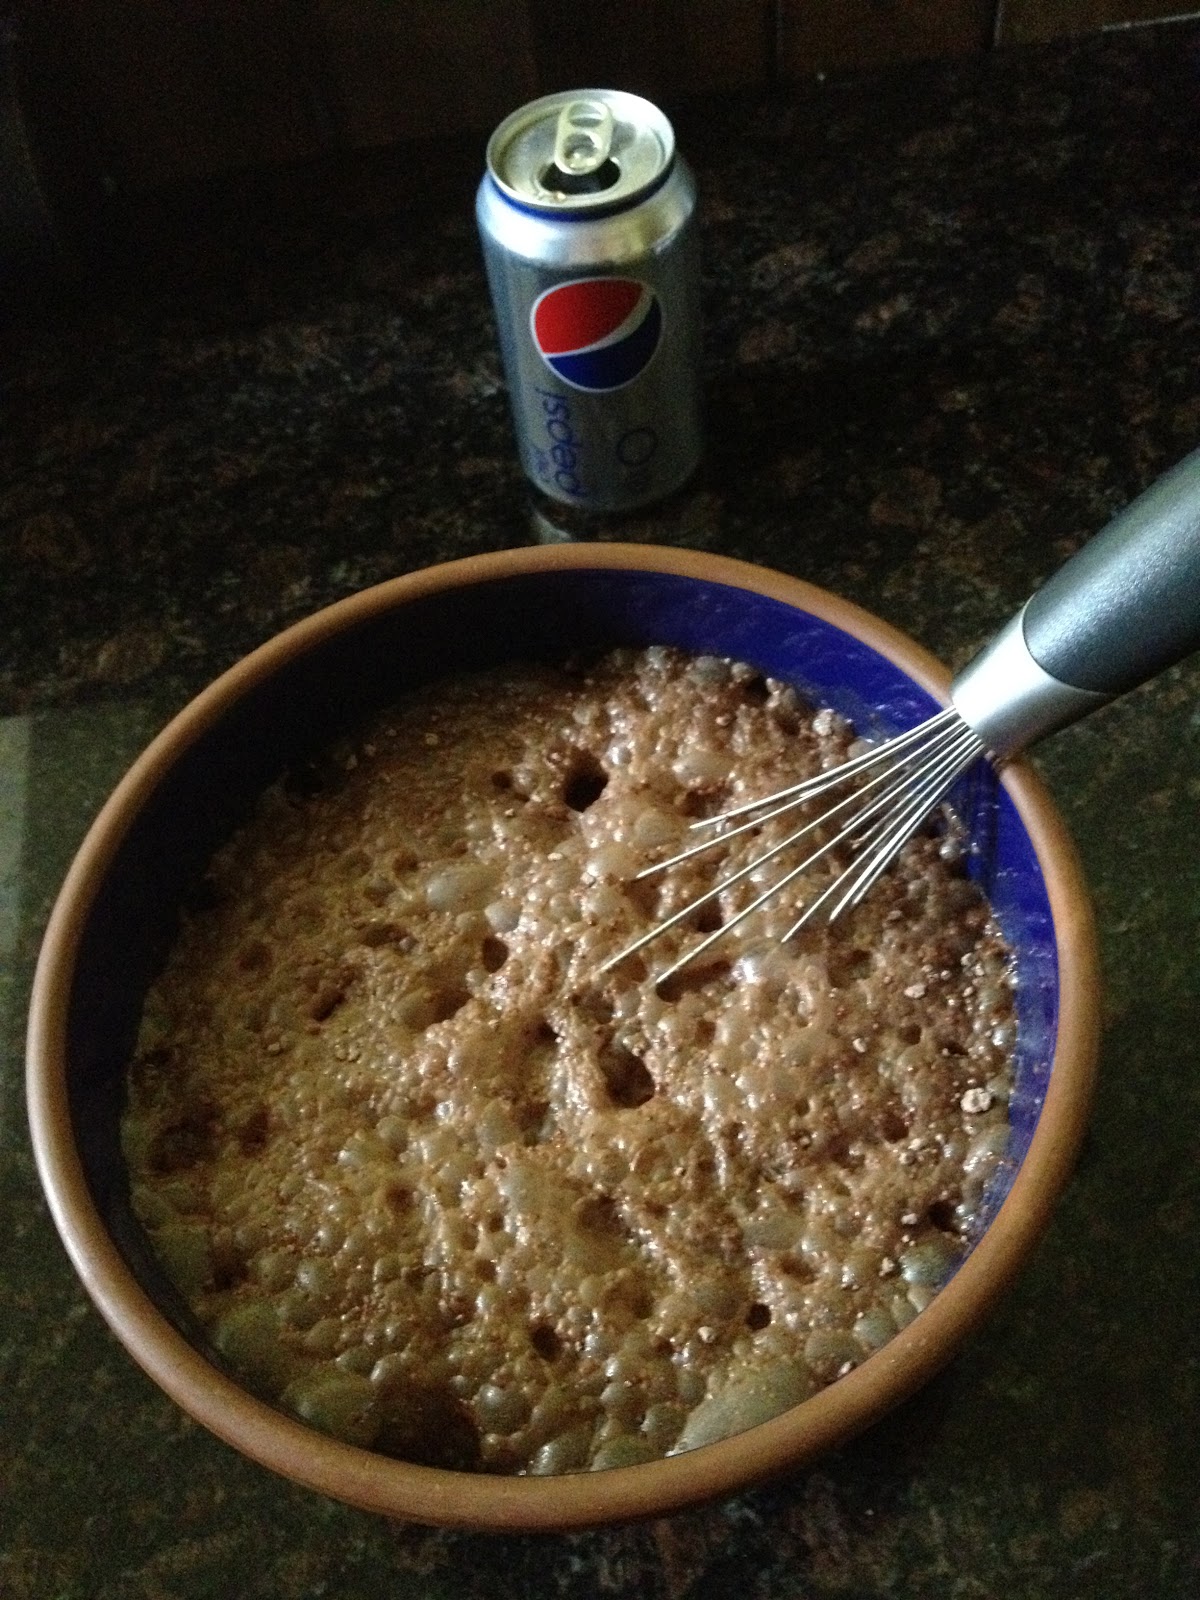
Today my husband and I were watching TV and saw a commercial for brownies that are low calorie.  My husband says 'mmmmmmm... brownies' in a Homer J. Simpson kind of way.  I on the other hand had a baby 10 months ago and am trying to watch everything I eat so that I can loose weight but I want a brownie too.  I remember seeing a post on Pinterest about Dt. Coke and Brownie mix.  I go on line, find that recipe and figure, heck, this should be easy especially since I have brownie mix and Dt. Pepsi!  I prefer Pepsi over Coke anyway.


  • I pull out my brownie mix.  Crap.  It has walnuts in it, I hope that doesn't mess it up.  

  • I pull out a can of Dt. Pepsi.  I hope there isn't some kind of magic ingredient in Coke that isn't in Pepsi.  

  • I read the directions that are given on the website: http://auntpegsrecipebox.blogspot.com/2011/02/diet-coke-brownies.html

  • I pull out a glass casserole dish and measure it.  Yup 9x13, SWEEEEET

  • I turn on the oven to 350 degrees and start making it.


After I stir it, I realise that all the walnuts are sinking to the bottom.  OK... so I'll have walnuts at the bottom instead of randomly... whatever.

I put it into my casserole dish and happily throw it in the oven.  30 min later I check it.  Not done.
I put it back in for another 10 min.  Not done.  Another 10 min...  Seems kind of done, I will cut it.  ICK!!!  Mushy on the bottom.  NOT DONE.

Hmmm...  My husband points out that its a glass dish and not an actual pan.  Does that make a diff?  So I lower the temp to 340 and put a pan under the casserole dish.  Another 15 min.  NOT DONE.

I give up.

Did I get compliments?  Uhhh... no.
Will I make it again?      Not in a friggin glass casserole dish!!

Was it really because it was glass and not metal?  

This is why I don't bake!

FAILED!!!

Update Sep. 18th

I tried this again but used a regular brownie pan and not a glass dish.  It was a little better but it was still really mushy.  I would not recommend following the Dt. soda and brownie mix for low calorie brownies.  They tasted okay but they ended up being thrown away.

Still a fail.


Colored Eggs R Us


OK so, last April I saw, on Pinterest, these beautiful eggs that were multicolored for Easter:


Aren't those beautiful?  You can find the how to's on http://realmomkitchen.com/10823/easter-deviled-eggs/   

So... I figured, what the h-e-double toothpicks?  Why not try it?  Doesn't look too hard.

When you go to the website you can print out the directions.  I pretty much did what it said but instead of using neon colors I used the ordinary colors.   I don't want to have to go out and buy more dye and I don't want to spend money.

The hardest part of this project is that you need some counter space because if you let the eggs touch each other when they come out of the dye, they could stain each other.  The shells are kind of annoying to get off AND spooning out the yolk was a pain.  I don't know if that's because I am an amateur or if it really is normally hard to get yolks out.  This is only the second time I have ever made deviled eggs.  Let me know.

These are the 4 BEST ones:

These are the 4 WORST ones:

Purple didn't work out so well but overall, I feel like I NAILED IT!!!  
Grant it they are not Easter pastel and I tried to be all artsie fartsie with a cake decorating application of the filling but still fun!  I took them to a party and all were gone when it was time to come home.  

Did I get compliments?  YES
Am I going to do it again?  YES  
I will post pics for when I do it again.

For those who have never boiled eggs:
  1. Get a large pot to hold however many eggs you have
  2. Fill it 3/4 full and let it come to a boil
  3. Get a big spoon to set eggs in boiling water gently
  4. Let them cook for 17 min
  5. Using your big spoon again, scoop them out (after turning off burner) and place each one back into the egg carton to cool off.


So what do you think?  Did I Fail or Nail?